How to pack a cooler: the USDA method, step by step
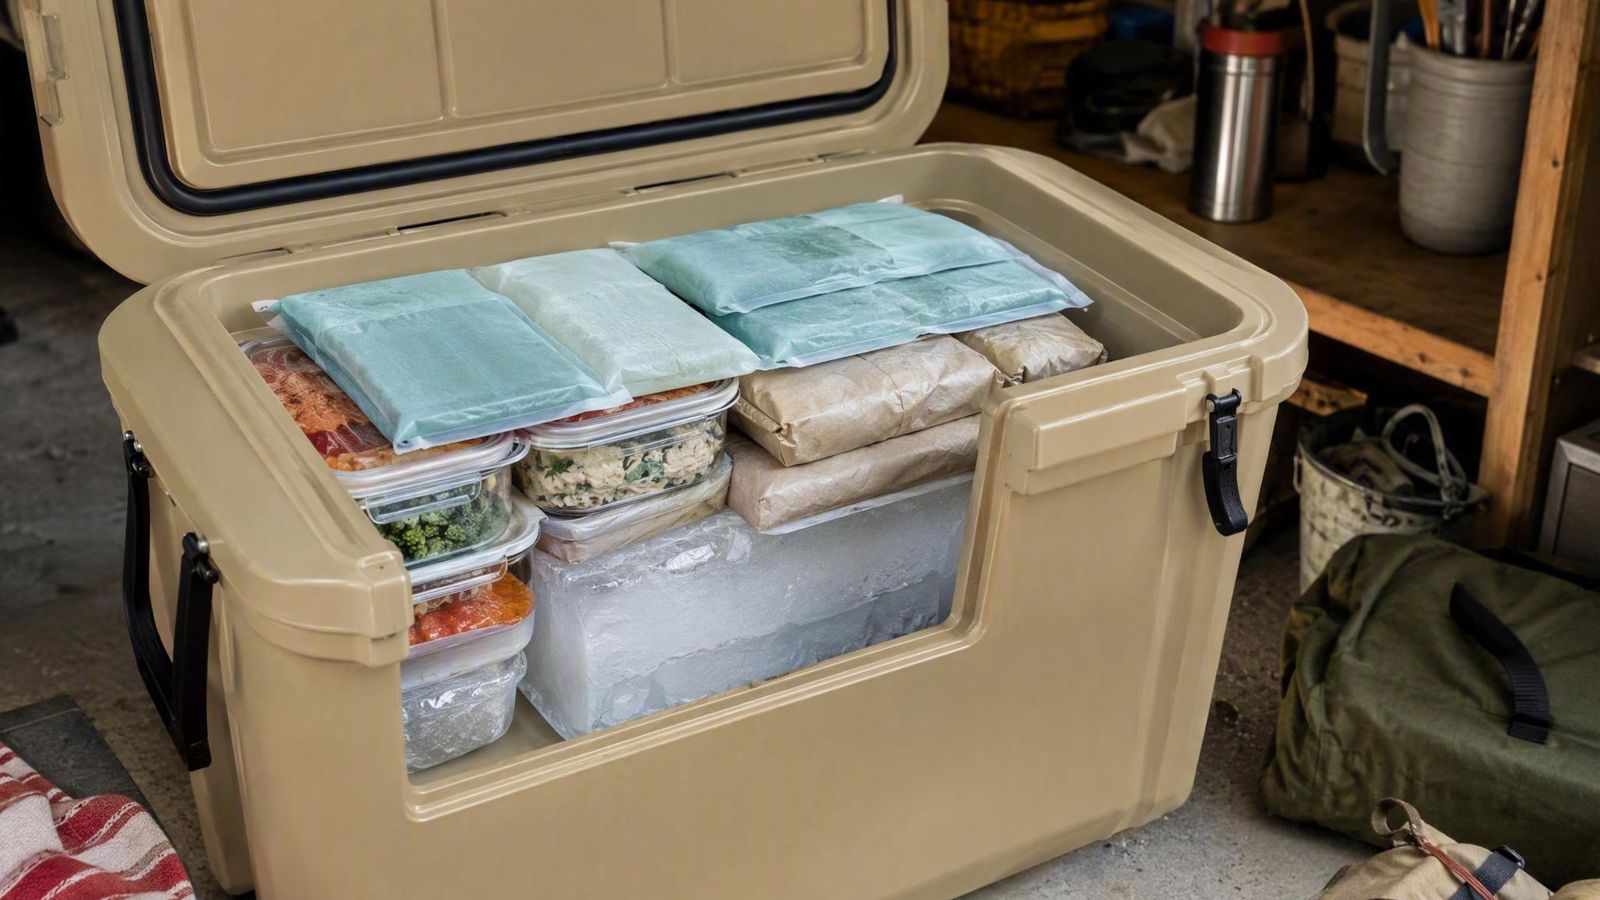
Packing a cooler well comes down to five moves: use block ice instead of loose cubes, pack in reverse order with raw meat sealed away from everything else, keep the lid closed and the cooler shaded, run a second cooler for drinks, and judge the leftovers by whether ice remains. Every one of those is a USDA rule, not a brand's marketing page, and this guide walks through them in packing order.
The cold source: block ice beats cubes
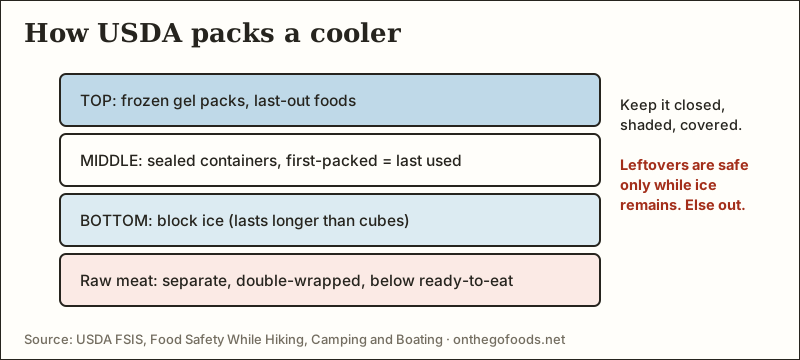
Blocks expose less surface area to warm air, so they outlast the same weight of cubes. Frozen water bottles and jugs are homemade blocks that double as drinking water as they thaw. Cubes still have a job: filling the air gaps between containers, because trapped air is what kills a cooler.
On the question everyone asks, how many bags of ice or how many hours a pound buys, the honest answer: USDA does not publish an hours-per-ice-pound figure, and any site quoting one is guessing. The ice itself is the gauge. While ice remains, the cold chain is working; the leftover rule at the end of this guide turns that gauge into a keep-or-discard decision. Sizing is simple: more ice than food feels reasonable, then a little more.
The packing order, layer by layer
Reverse order means thinking in days before layers: the last day's dinner goes in first and ends up at the bottom, today's lunch goes in last and sits on top, so you never excavate the cooler with the lid open. The full sequence:
- Chill or freeze everything first. The cooler keeps cold food cold; it does not cool warm food down. Every item goes in refrigerator-cold, and the cooler itself gets pre-chilled with a sacrificial bag of ice.
- Set the ice blocks or frozen bottles on the bottom, where the coldest layer belongs.
- Add raw meat or poultry next, double-bagged and kept low, so any drips stay sealed and below the ready-to-eat food, per the rule above.
- Load the rest in reverse order of use: last day's food deepest, first day's food shallowest.
- Fill every air gap with ice cubes or small frozen bottles. A packed-tight cooler holds cold dramatically better than a half-empty one.
- Finish with today's items and the fragile things, like eggs in a hard container and delicate produce, on top where nothing crushes them.
- Stage the cooler in the car, not the trunk: the shadiest, coolest spot in the cabin, covered with a blanket for extra insulation.
Two coolers, shade, and a lid that stays shut
This is the highest-value habit in the guide. Every lid opening trades cold air for hot, and drinks are what everyone reaches for. Give the drinks their own cheap cooler that can be opened forty times a day, and treat the food cooler like a vault: it opens at mealtimes, briefly, and closes. No second cooler? Put the drinks at the very top so reaching them never exposes the food layer.
What never needed the cooler
Every item kept out of the cooler is space for another ice block and one less lid opening. Move shelf-stable food to a cabin tote; ideas for filling it are in road trip snacks, and the meals worth the cooler space are in road trip meals.
The ice-remaining rule: how the trip ends
This is the payoff for skipping invented hour-math: you never reconstruct how long the cooler sat in the sun, you just look inside. Ice present, food stays in play; ice gone, perishable leftovers go in the trash, even the expensive ones. On multi-day trips, restock ice before it fully melts, because the rule judges when the ice ran out, not when you noticed.
The mistakes that melt ice by noon
| Mistake | Why it fails | Do this instead |
|---|---|---|
| Warm food and drinks go straight in | The ice spends itself doing the refrigerator's job | Chill everything overnight; the cooler maintains cold, it does not create it |
| One cooler for food and drinks | The lid opens constantly and hot air pours in, per the rule above | A second cooler for drinks; the food cooler opens only at meals |
| Cooler rides in the trunk | The trunk is the hottest box in the car | Shadiest cabin spot, covered with a blanket |
| Only loose cubes, no blocks | Cubes melt faster than blocks, per the rule above | Frozen jugs and bottles as the base, cubes for gaps |
| Raw meat wrapped once, placed anywhere | One leak contaminates ready-to-eat food | Double-bagged, packed low, isolated |
| Half-empty cooler | Empty space warms fast every time the lid opens | Fill gaps with cubes, frozen bottles, or towels |
| Keeping leftovers after the ice is gone | The gauge is gone; the cold chain already failed | Discard perishable leftovers, per the ice-remaining rule |
The pre-trip cooler checklist
The night before the trip
- Freeze the blocks: jugs, bottles, or gel packs go into the freezer a day ahead
- Every cooler-bound item is cooked, portioned, and chilling in the refrigerator
- Raw meat, if any, is double-bagged and stationed to go in low
- Drinks are chilling for their own cooler or tote
- Shelf-stable food is out of the cooler plan and in the cabin tote
- A blanket rides along to cover the cooler, and its shaded cabin spot is agreed on
The cooler is one piece of the larger plan in the road trip food hub. The time-and-temperature rules underneath all of this live in the food safety hub, starting with the danger zone.
Sources
- USDA FSIS: Food Safety While Hiking, Camping & Boating · www.fsis.usda.gov (accessed 2026-08-31)